Importing a shapefile
Note: The option to import shapefiles is subscription-dependent, and therefore may not be available to you.
You can import a Zip file containing one or more shapefiles and add each shape onto the map as a catchment. This is useful if you have created the shapefiles using a third party mapping tool and want to quickly present the information onto the Location Analyst map.
The following applies when importing a shape file:
- The shapefiles you import must be contained within a Zip file, with a maximum size of 10Mb.
- The Zip file can contain one or more shapefiles.
- Shapefiles must use the WGS84 map projection. Any custom projection (prj) files supplied with the shapefile are not be applied
- Each shapefile must comprise a minimum of *.shp, *.dbf and *.shx sub-files.
- Each shapefile can contain one or more shapes.
- The maximum number of shapes within a Zip file is 200.
- Only Polygon shapes within a shapefile are supported. All other shape types such as Lines, PolyLines, and Points etc, are not supported and are ignored and not imported.
- All shapes are bounds-tested upon import, and any which lie outside the bounding box for the customer's region, generates an error message.
- Shapes are named from the Name column (if present) in the shapefile. If the Name column is not present, the name is generated using the name of the shapefile followed by a numeric suffix.
To import a Zip file containing one or more shapefiles:
- Click the
 Data menu option. The Manage Data page is displayed.
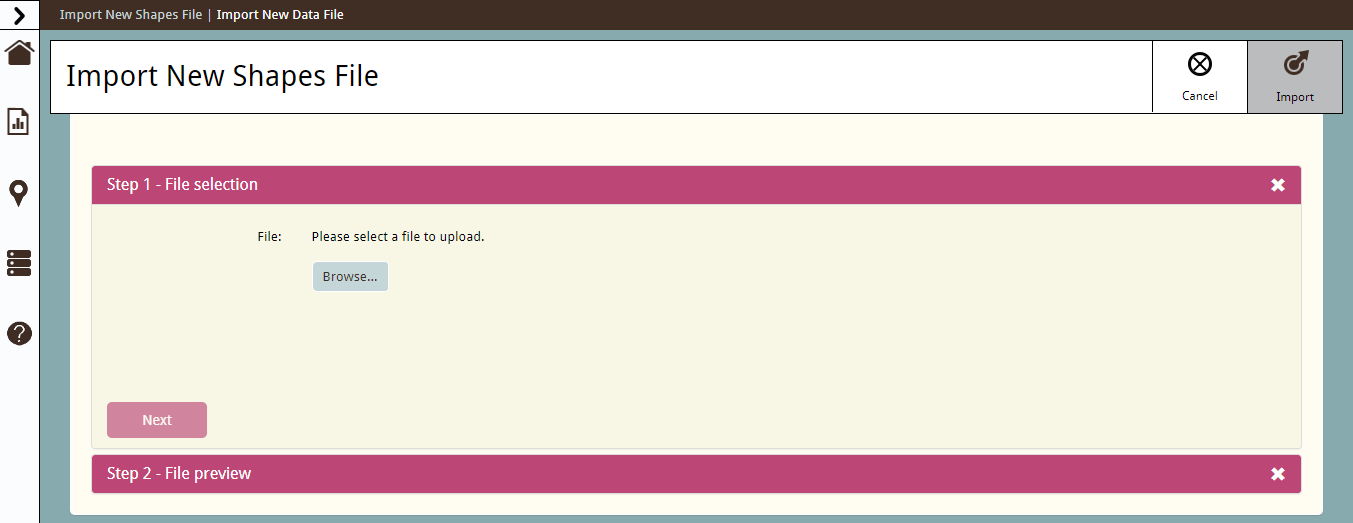
 - Scroll down to the Imported Shape Files section and click Import a new shape file. The Import New Shapes File page is displayed with the Step 1 panel open. Click on the image below to view the window.
- Click Browse.... The Choose File to Upload or Open dialog is displayed (depending on the browser being used):
- Browse to the Zip file to be imported and select it.
- Click Open. The Choose File to Upload or Open dialog is closed.
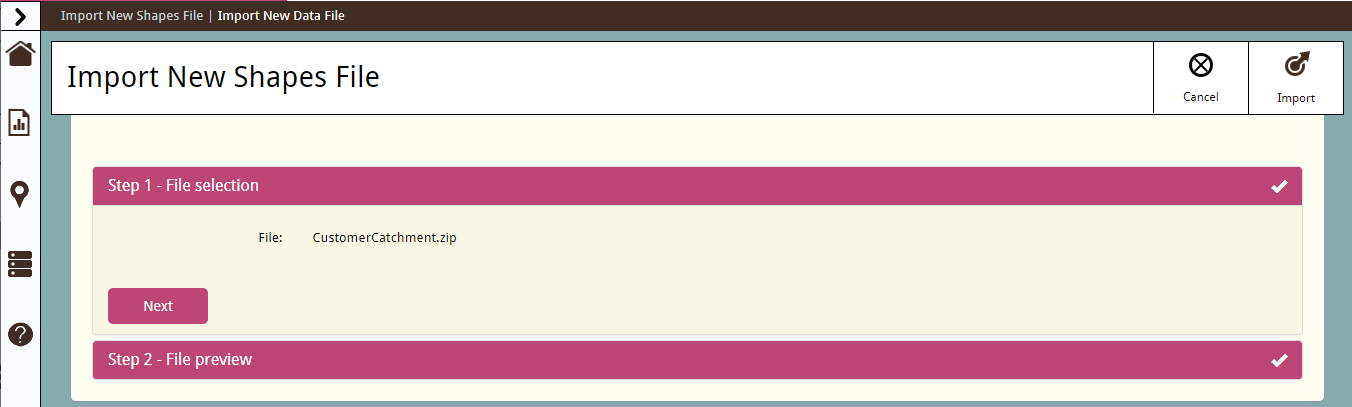
- The Step 1 panel is refreshed and displays the name of the file that has been uploaded and a Next button. Click on the image below to view an example.
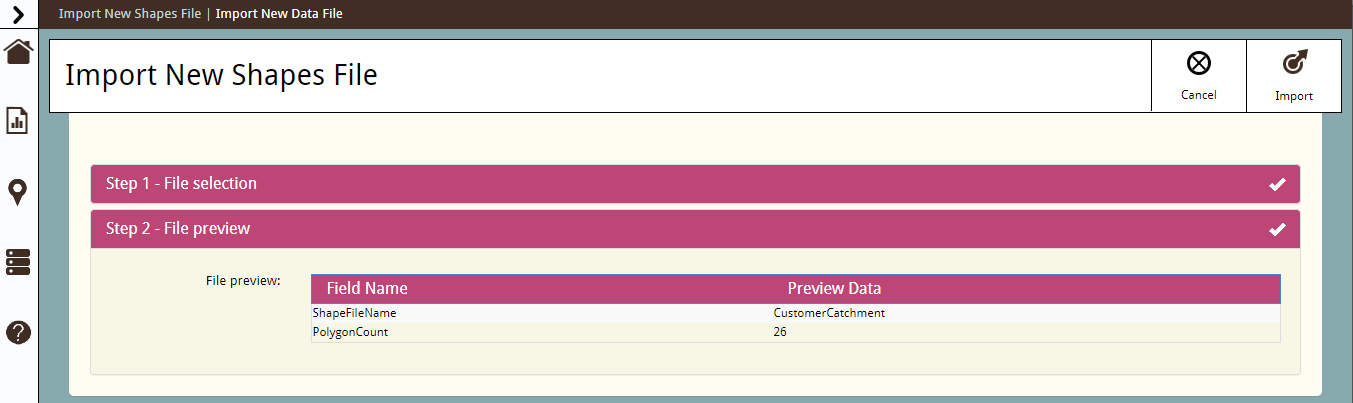
- Click Next. The Step 1 panel is closed, and the Step 2 panel is opened, giving the a preview of the file. This identifies the name of each shapefile you are importing and the Polygon count or number of shapes found within the shapefile. Click on the image below to view the window.
- Click
 Import. The file import process into Location Analyst commences, the Import New Shapes File page is closed, and the Manage Data page is re-displayed.
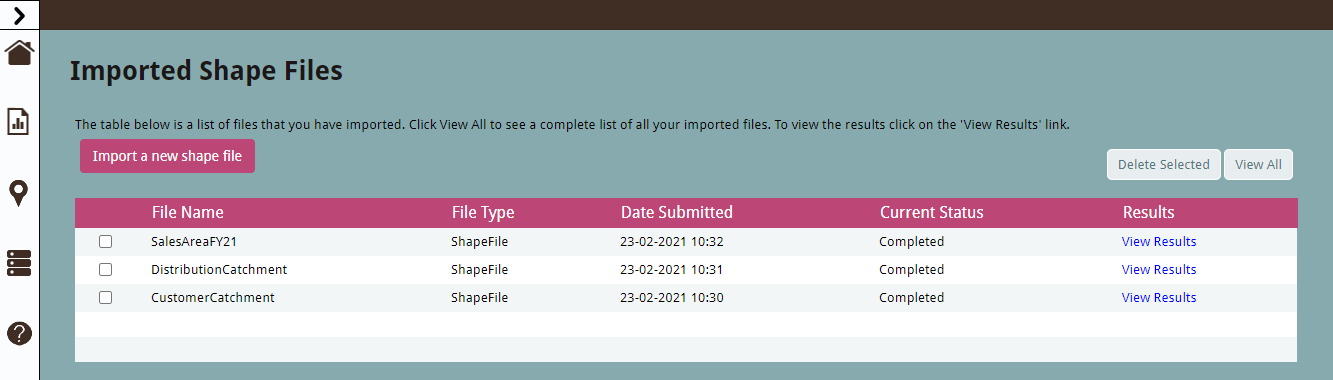
 - Scroll down to the Imported Shape Files section to view the Current Status of the import process. When the status has changed to Completed, a View Results link is displayed. Click on the image below to view the window.
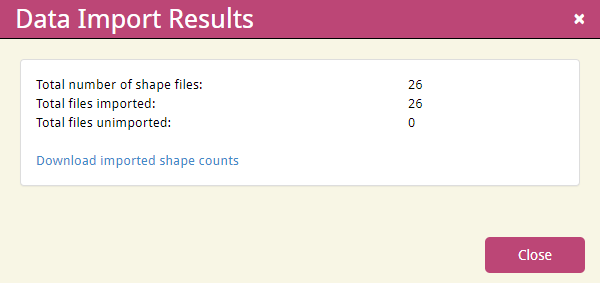
- To view the results of your shapefile import, click on the View Results link. A Data Import Results dialog is displayed.
Click on the image below to view the window.

The dialog shows the total number of shapefiles in your imported file; the total number of shapefiles that were successfully imported; and the total number of shapefiles which could not be imported, e.g. because they contained shapes which are invalid.
You can use the links on the dialog to download a file in CSV format giving the count of the number of shapes or polygons and the name of each shapefile that was successfully imported. You can also and download a file in CSV format which the name of each shapefile and the names of its shapes which were unsuccessfully imported.
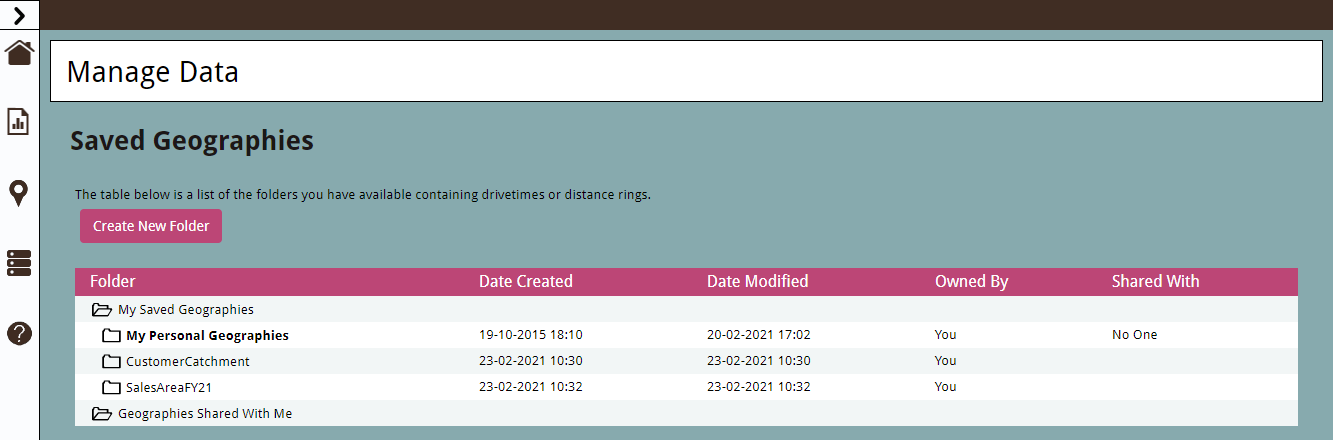
- If the import has been successful, Location Analyst saves the data under the Saved Geographies section of the Manage Data page in one or more folders under My Saved Geographies. These folders are named after the name of the shapefile found within you Zip file. For example, a Zip file which contains a shapefile called CustomerCatchment will be imported and stored in a folder called CustomerCatchment as shown below. Click on the image below to view the window.
The folder contains one or more geographies or catchments which are related to the shapes which have been found in the shapefile. The names these geographies are taken from the name of each shape found within the shapefile. For example, the CustomerCatchment folder contains the geographies or catchments shown in the image below:
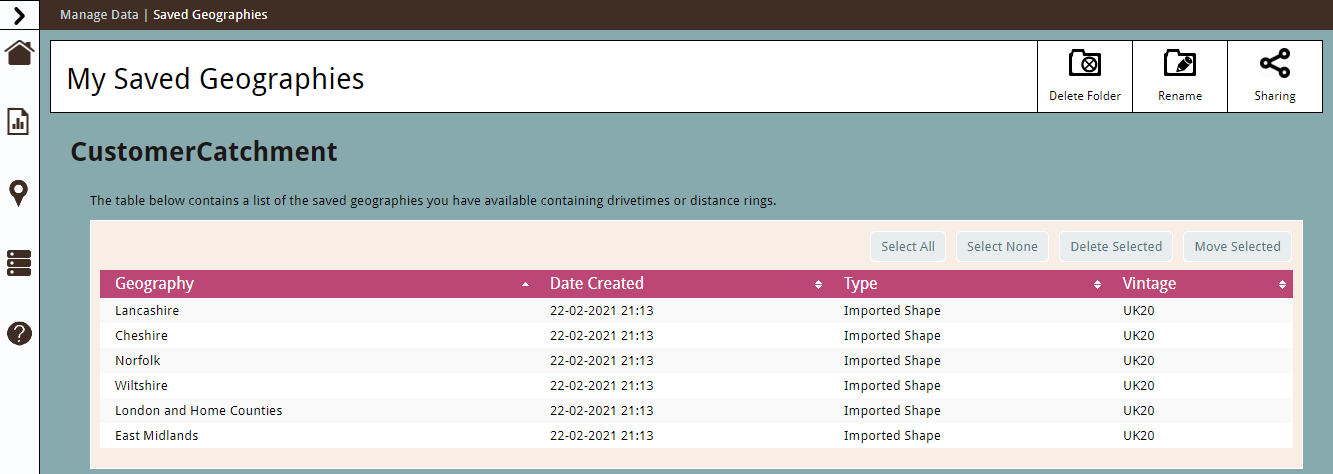
If the names of shapes within the shapefile do not exist, then the geographies are named after the shapefile followed by numeric suffix. For example, CustomerCatchment1, CustomerCatchment2, CustomerCatchment3 etc.
Catchments which have been created from imported shapefile are given a type of Imported Shape. You can add these catchments to the map in the same way as you would for all other saved geographies
E: emsukhelpdesk@experian.com
T: +44 (0)333 000 3030