Importing a data file
Location Analyst lets you import any of the four types of data file:
- Locations - contains data which defines the locations of outlets such as stores, competitors, pubs, schools. The locations can be defined by postcodes, or by lat/long coordinates. These locations can be mapped or used to create a catchment area.
- Customers - contains data which defines the location of customers. The locations can be defined by postcodes, or by lat/long coordinates. This data can be mapped or used to create a catchment area. Customer data which has been imported using postcodes can be profiled using a classification such Mosaic UK 7. It is not possible to profile customer data which has been imported using map coordinates.
- Brick Geography – contains data which defines your catchment areas (for example, sales regions or distribution zones) at a specified brick level such as Postal Sector or Output Area. The imported data is saved as a catchment for each individual region or zone to a specified folder under My Saved Geographies. The catchments can then be displayed on the map and used to create a report to allow you to understand more about the area.
- Brick Variable - contains data which defines numeric variable information (for example, sales revenue or the number of loyalty card holders) at a specified brick level such as Postal Sector or Postal District. The imported data can then be displayed on the map.
The file to be imported must have been saved in the comma-separated variable (CSV) format. The file can contain an optional header row which identifies the name of each field or column. Depending on the application which was used to create the CSV file, the data may be enclosed in single or double quotes, for example “A customer name” or ‘A customer name’.
The data must include up to three mandatory fields depending on the file type being used. You must then use Location Analyst import wizard to map each of the required fields within the CSV file to the appropriate name describing the data, as shown in the table below.
Note: For clarity, in the table below the information for Locations and Customers file types have been split into those that contain geocoded (lat/long coodinates) data and those that do not, i.e. that contain postcodes.
|
File type |
Field mapping name |
CSV field contains |
|---|---|---|
|
Locations |
Postcode |
A valid UK postcode. |
|
Name (see Note) |
The name of the location. |
|
|
Locations (geocoded) |
X |
A valid easting or longitude in WGS84 format within the boundary of the country. |
|
Y |
A valid northing or latitude in WGS84 format within the boundary of the country. |
|
|
Name |
The name of the location. |
|
|
Customers (non-geocoded |
Postcode |
A valid postcode. |
|
Name (see Note) |
The name of the customer. |
|
|
Customers (geocoded) |
X |
A valid easting or longitude in WGS84 format within the boundary of the country. |
|
Y |
A valid northing or latitude in WGS84 format within the boundary of the country. |
|
|
Name |
The name of the customer. |
|
|
Brick Geography |
Brick ID |
The ID of the brick at the specified level (e.g. the ID of a Postal District or Postal Sector). |
|
Region/Zone |
The name of the region or zone. |
|
|
Brick Variable |
Brick ID |
The ID of the brick at the specified level (e.g. the ID of a Postal District or Postal Sector). |
|
Name |
The name of the area. |
|
|
Variable |
The numeric value of the variable (e.g. a sales figure). |
Note: The Name field for non-geocoded Locations and Customers file types is regarded as optional. This is because you can use a CSV file which contains only one column which defines the postcodes of your locations or customers. If you do this you will not see the Name mapping field when you import a non-geocoded file. However, if the CSV file contains two or more columns, it is assumed that one of the columns contains the names and must be mapped to the Name mapping field.
When a file is imported, the mapping of all fields is set to Ignore. Any additional fields within the imported file must be left at the Ignore value.
Note: When you are creating a Profile report, the number of records that can be imported from your data file depends on your subscription level.
The import wizard comprises 4 named steps presented as expandable/collapsible panels. As each step is successfully completed, a tick is displayed in the right-hand side of the heading. If a cross is displayed, you will be able to open the other steps but you will not be able to complete the import process.
To import a CSV data file:
- Click the
 Data menu option. The Manage Data page is displayed.
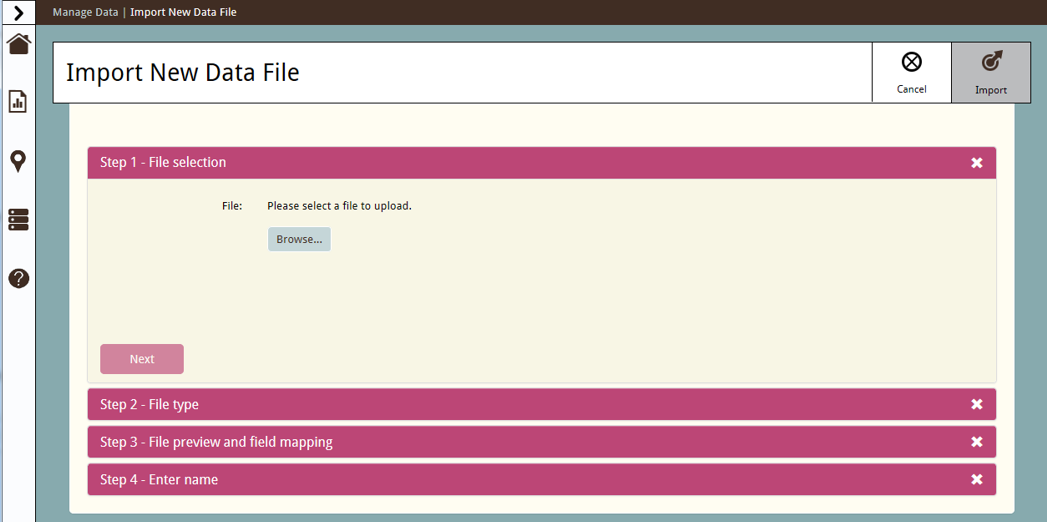
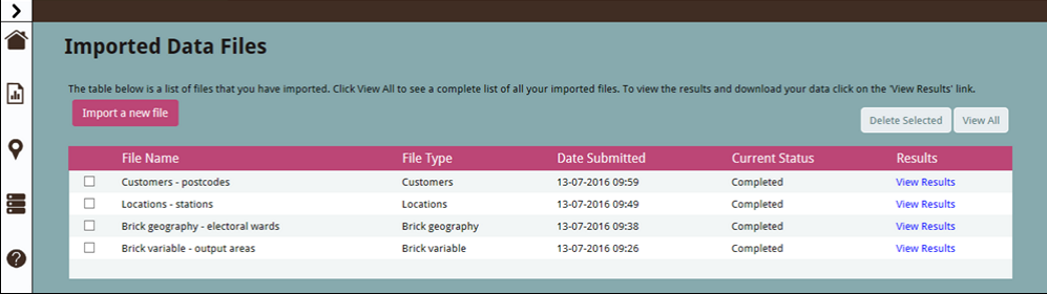
 - Scroll down to the Imported Data Files section and click Import a new file. The Import New Data File page is displayed with the Step 1 panel open. Click on the image below to view the window.
- Click Browse.... The Choose File to Upload or Open dialog is displayed (depending on the browser being used):
- Browse to the CSV file to be imported and select it.
- Click Open. The Choose File to Upload or Open dialog is closed.
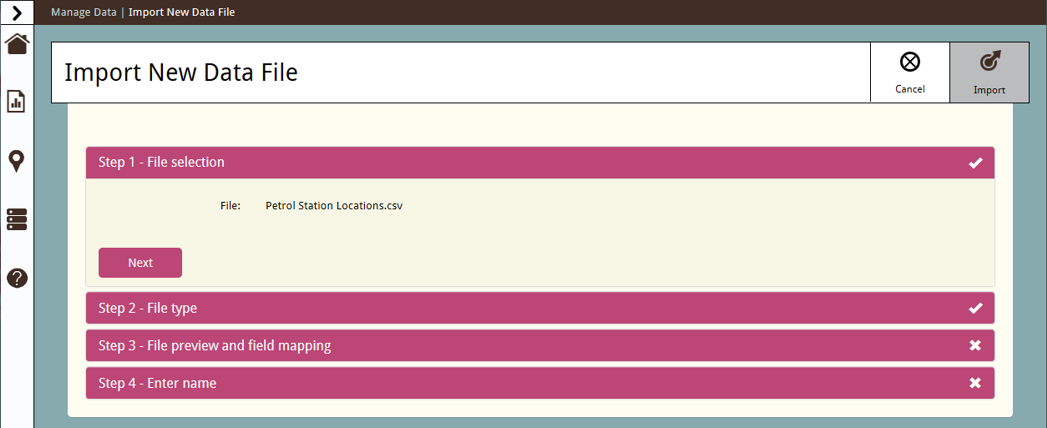
- The Step 1 panel is refreshed and displays the name of the file that has been uploaded and a Next button. Click on the image below to view an example.
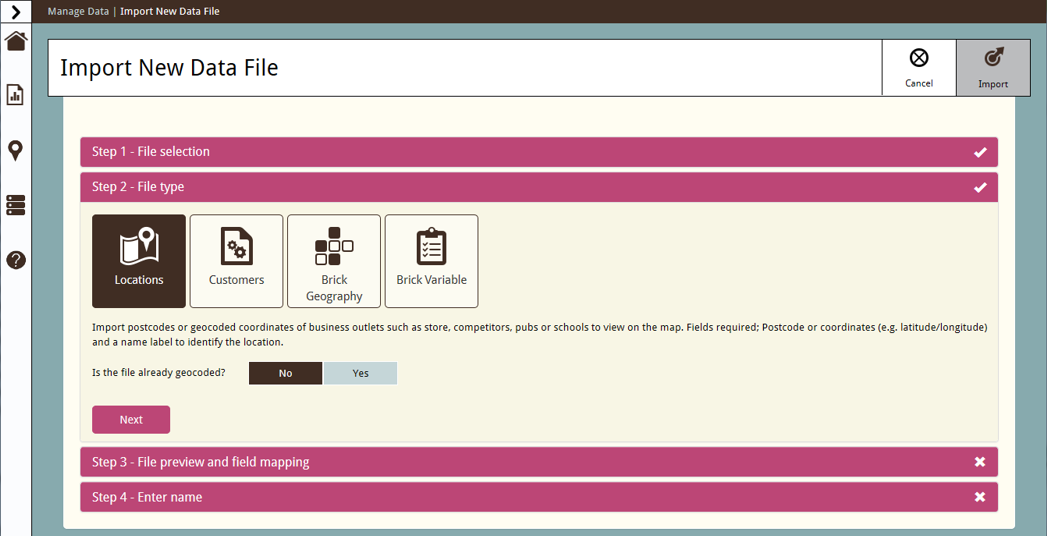
- Click Next. The Step 1 panel is closed and the Step 2 panel is opened, giving the choice of the 4 file types. Click on the image below to view the window.
- Depending on the type of data that is contained in the CSV file, click on the appropriate icon (Locations, Customers, Brick Geography or Brick Variable).
- If you are importing Locations or Customers data you have the option to select whether the file has already been geocoded, i.e. contains includes columns defining the locations as map coordinates. If the file contains geocoded data, click Yes. The Step 2 panel is refreshed to show a Projection System drop-down list and explanatory text. Click on the image below to view the window.
- When you have selected the type of file and selected any geocoding options, click Next. The Step 2 panel is closed, and the Step 3 panel is opened, giving a preview of the contents and field mapping options. Click on the image below to view an example.
- Depending on the application that created the CSV file, the text fields may be enclosed by single or double quote characters. If this is the case, select the appropriate Text qualifier.
- If the File has a header, click Yes; otherwise click No. If the file does not include a header, then the Field_1, Field_2, Field_3 etc. are displayed as the Field Name.
- The Field Mapping drop-down list for each field in the imported file is initially set to Ignore. The options available from each list are dependent on the file type which was selected (see the table at the start of this section). Identify the type of data contained in each field and select the appropriate value from the associated Field Mapping drop-down list, or leave it set to Ignore.
- If the Brick Geography or Brick Variable file type was selected in Step 2, then from the Brick Level drop-down list select the brick level which matches the data in the CSV file.
- Click Next. The Step 3 panel is closed, and the Step 4 panel is opened. What is displayed within the Step 4 panel is dependent on the file type which you selected in Step 2:
- If you selected the Locations or Customers file type which is non-geocoded, then the Step 4 panel includes options to add segmentation data to the imported file, as well as naming the imported file. Click on the image below to view the window.
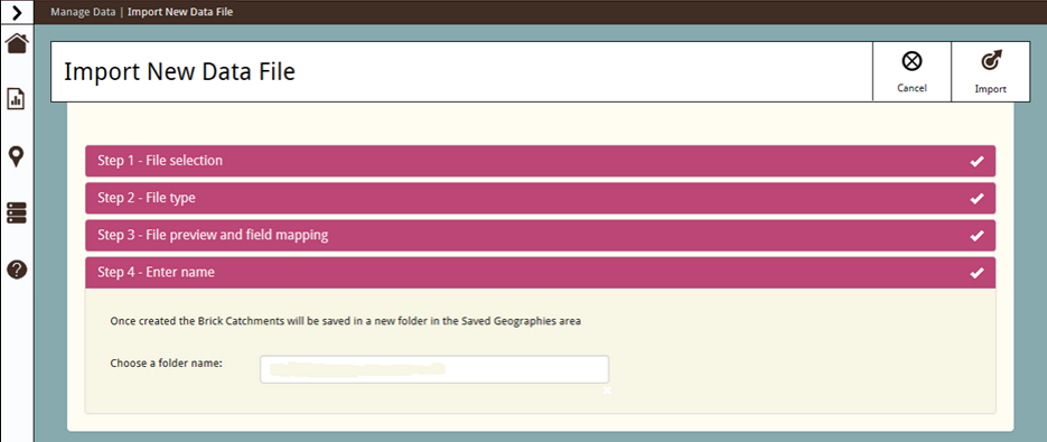
- If you selected the Brick Geography file type, then the Step 4 panel lets you name folder that will contain the brick level catchments under the My Saved Geographies folder. This name will also be used for naming the imported file. Click on the image below to view the window.
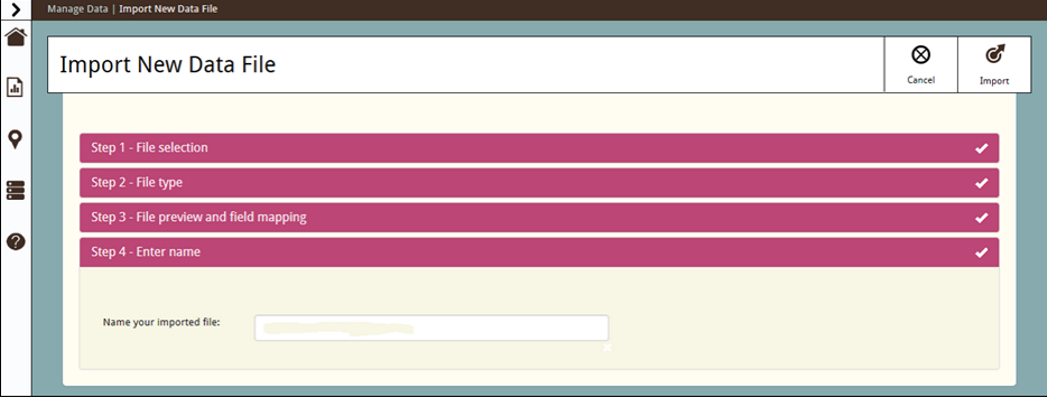
- If you selected the Locations or Customers file type which has been geocoded, or if you selected the Brick Variable file type, then the Step 4 panel lets you name the imported file. Click on the image below to view the window.
- If you selected the Locations or Customers file type and which is non-geocoded and you wish to add segmentation data to the imported file, select the required segmentation (for example, Mosaic UK 7).
- If you selected the Locations, Customers or Brick Variable file type, then in the Name your imported file textbox, type the name for the imported file (as stored in Location Analyst).
- If you selected the Brick Geography file type, then in the Choose a folder name textbox, type a unique name for the folder that will contain the brick level catchments under the My Saved Geographies folder. This name will also be used for naming the imported file (as stored in Location Analyst).
- Click
 Import. The file import process into Location Analyst commences, the Import New Data File page is closed, and the Manage Data page is re-displayed.
 - Scroll down to the Imported Data Files section to view the Current Status of the import process. When the status has changed to Completed, a View Results link is displayed. Click on the image below to view the window.
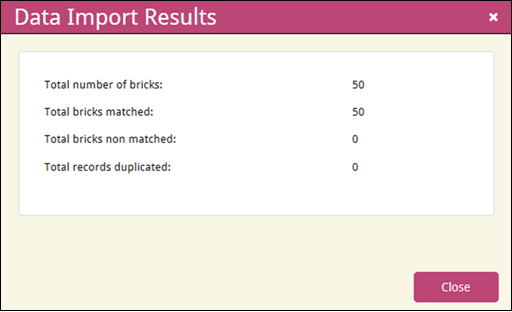
- To view the results of your data import, click on the View Results link. A Data Import Results dialog is displayed. What is displayed within the Data Import Results dialog is dependent on the file type:
- Locations - the Data Import Results dialog shows the total number of records in your data file; the total number of records that matched the geocode data; and the total number of records that did not match the geocode data (e.g. the postcode for the record may be missing or invalid). Click on the image below to view the window.
- Customers - the Data Import Results dialog shows the total number of records in your data file; the total number of records that matched the geocode data; and the total number of records that did not match the geocode data (e.g. the postcode for the record may be missing or invalid). Click on the image below to view the window.
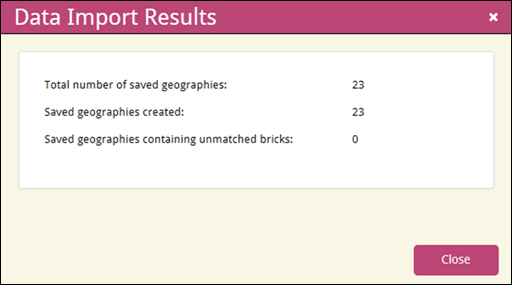
- Brick Geography - the Data Import Results dialog shows the total number of saved geographies in your data file; the total number of saved geographies that matched the geocode data; and the total number of saved geographies did not match the geocode data (e.g. the brick ID for the record may be missing or invalid). Click on the image below to view the window.
- Brick Variable - the Data Import Results dialog shows the total number of bricks in your data file; the total number of bricks that matched the geocode data; the total number of bricks that did not match the geocode data (e.g. the brick ID for the record may be missing or invalid); and the total number of records which were duplicated. Click on the image below to view the window.
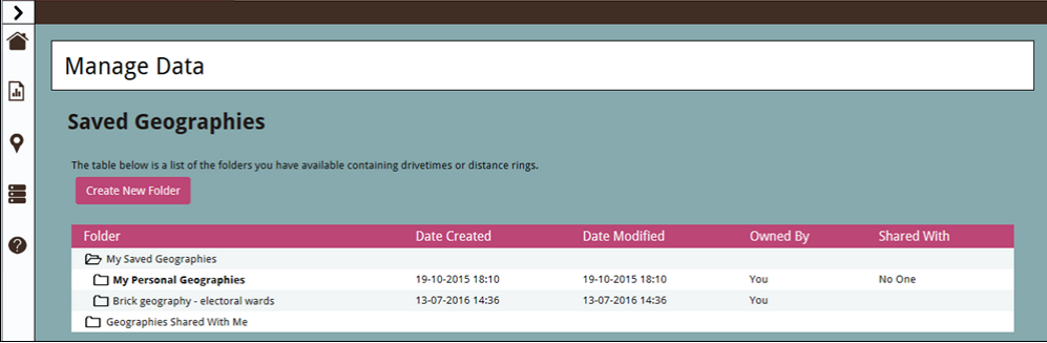
- If you selected the Brick Geography file type, you can view the catchments from the Saved Geographies section of the Manage Data page in the folder you created under My Saved Geographies. For example, Brick Geography data has been imported and stored in the folder Brick geography – electoral wards as shown below. Click on the image below to view the window.
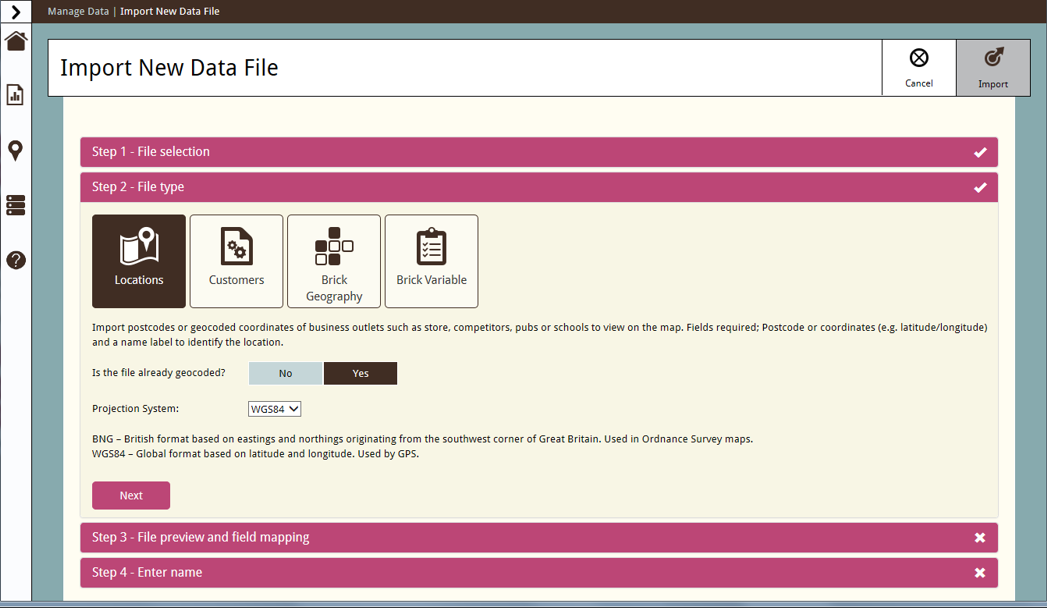
Two map projection systems are available: BNG (British National Grid) based on eastings and northings which are used on Ordnance Survey maps, and WGS84 which is a global format using a GPS longitude and latitude.
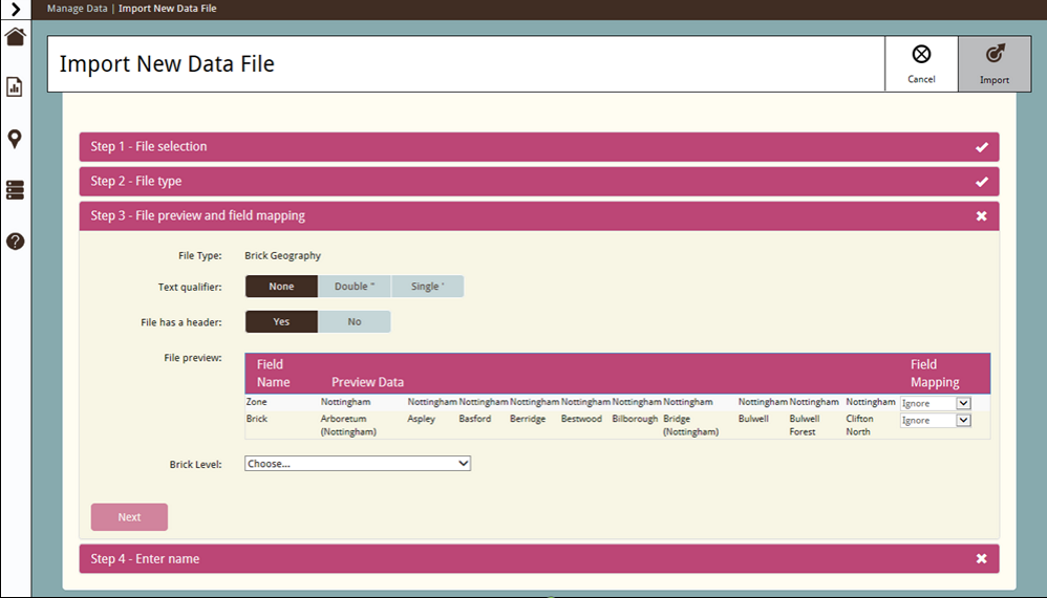
Note: If the Brick Geography or Brick Variable file type was selected in Step 2, then the Step 3 panel includes a Brick Level drop-down list. This is not displayed if the Locations or Customers file type was selected.
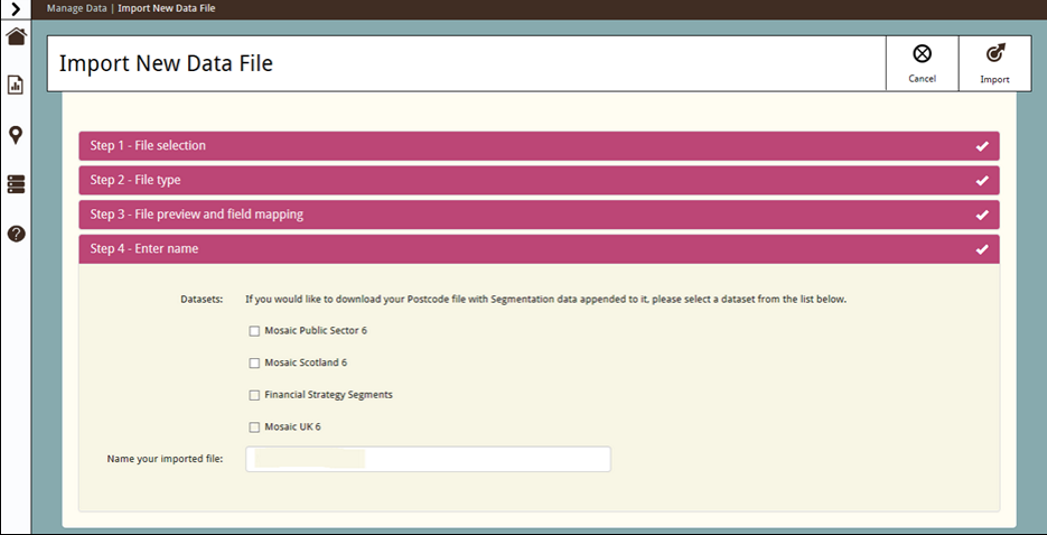
Notes: The segmentation data available for you to select will depend on your subscription.
If you have added one or more segmentations to the imported file and you add the data to the map, you will be given the option to apply a Single Colour or a Preset Theme if you choose to style the layer. The Preset Theme lets you colour the points on the map using the colours from a selected segmentation.
Note: When you import a non-geocoded file, a process called geocoding is run to validate the postcodes or brick level IDs stored in the file and to attach a geographic identifier. The geocode is used to match the postcodes or brick level IDs with segmentation data.
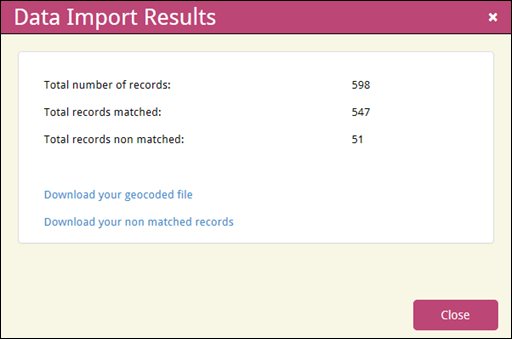
You can use the links on the dialog to download your geocoded file in CSV format and download the non-matched records in CSV format.
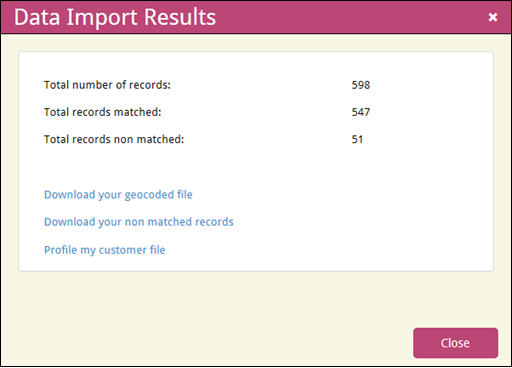
You can use the links on the dialog to download your geocoded file in CSV format; download the non-matched records in CSV format; and open the Reporting page to use the data file to create a profile report.
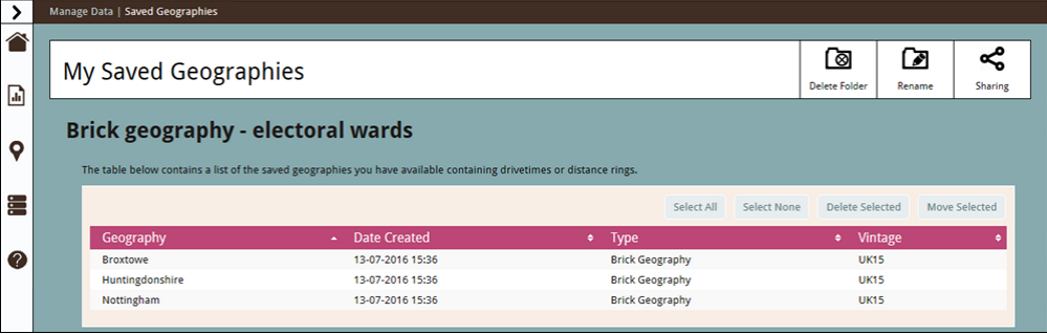
This Brick geography – electoral wards folder contains the following Electoral Ward catchments. Click on the image below to view the window.
E: emsukhelpdesk@experian.com
T: +44 (0)333 000 3030